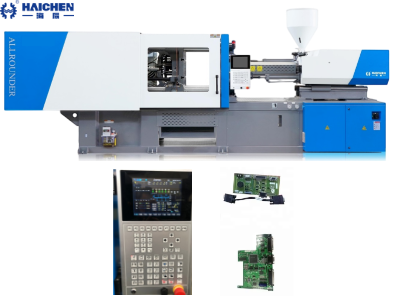
Installation and use of injection molding machine requirements of environmental, Plastic injection molding machine Shipping and Transfer.
A plastic injection molding machine is a kind of heavy machinery, to ensure the safety and normal operation of the machine.
The first step is to pay attention to the lifting and installation of the injection molding machine.
The following are the steps and some precautions for lifting and installing the injection molding machine.
Installation and use of plastic injection molding machine is one of important step.
Plastic injection molding machine Conditions requirements of environmental
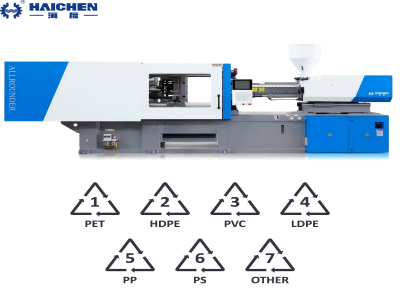
Injection molding machines are also known as injection molding machines or injection machines.
Four key points to consider, about the environmental requirements for injection molding machines using.
It is the main molding equipment for making thermoplastic products of various shapes using plastic molding molds.
It is divided into vertical, horizontal, and all-electric types.
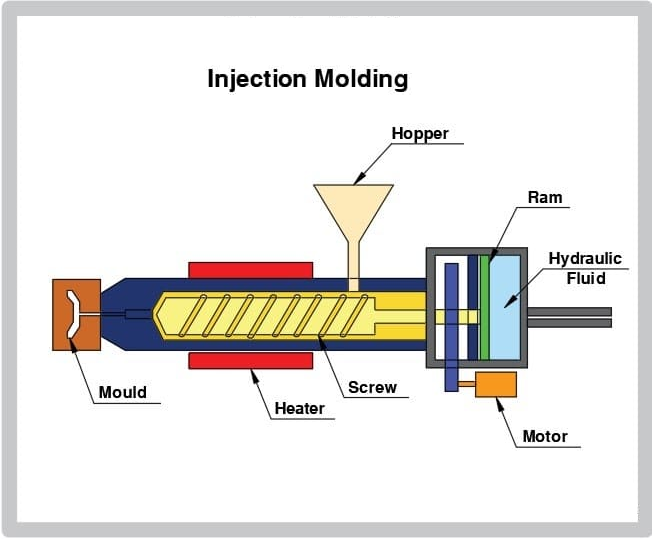
The injection molding machine heats the plastic and applies high pressure to the molten plastic, causing it to be shot out and fill the mould cavity.
Requirements of Environmental
When the injection molding machine is installed, it is necessary to pay attention to the surrounding environment, which is easy to operate and has good lighting and ventilation.
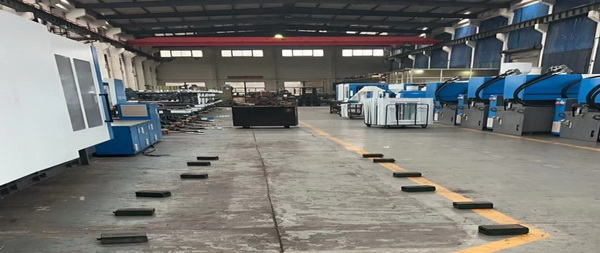
The ambient temperature during operation is 0~40 °C, and the relative humidity is below 75%, and there shall be no condensation.
If the humidity is too high, the insulation performance of the electrical components will be reduced, or the electrical components will be aged prematurely.
The altitude is less than 1000m.
The injection molding machine shall not be installed in a place with a lot of dust and a high concentration of corrosive gases.
The place where the injection molding machine is installed should be far away from equipment that will cause electrical or magnetic field interference (such as welding machines, etc.).
When installing an injection molding machine, attention should be paid to the maintenance of the equipment.
The disassembly of the mold, and the storage space of raw materials and finished products.
The space height of the plant should allow for mould hoisting.
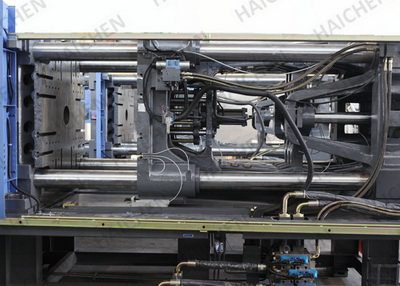
If installing the machine on a concrete foundation, then the civil engineer should confirm the condition of the foundation before proceeding with the construction of the concrete foundation.
If installing the injection molding machine on a flexible anti-seismic foot.
It can save the foundation, but the ground bearing capacity requires the ground bearing capacity to exceed 10t/m².
And such a shockproof pad puts the whole machine in a stable and horizontal running state.
the installation location for the machine should be a ventilated, dry.
And dust-free area with sufficient operating space to facilitate installation, debugging and maintenance around the equipment.
Additionally, ensure that operators can easily inspect, retrieve, and transport products.
The installation area must provide adequate space.
Plastic injection molding machine Shipping and Transfer
Important Guidelines for Shipping and Transfer Team.
We wanted to bring your attention to the essential principles that need to be followed in order to ensure the safety of our personnel during transportation and transfer.
As well as the smooth installation and usage of the equipment.
Please review the following guidelines carefully.
1. Skilled Workforce:
The operation should be carried out only by experienced workers with extensive knowledge of transportation and transfer.
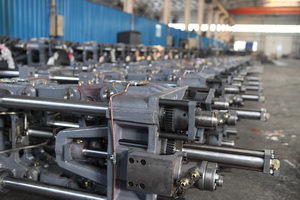
2. Hoisting Devices
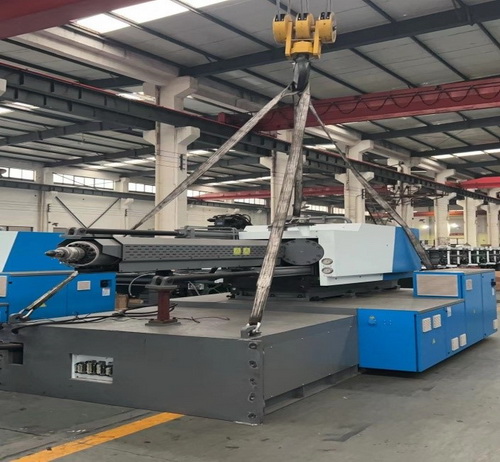
Use hoisting devices and steel cables with sufficient bearing capacity.
The weight of the machine can be found on the machine nameplate or in the technical data and basic plan section of the agreement.
3. Hoisting Points:
Only use the designated hoisting points for transport.
Do not use bent or damaged hoisting gear.
Verify the wire rope travel arrangement from the hoisting point to the hoisting gear position.
4. Suspension Point:
Do not change the suspension point of the load under any circumstances.
5. Horizontal Position:
The injection molding machine must be lifted and transported in a horizontal position along the length and width.
6. Hoisting Drawing:
Please refer to Appendix 4 for the Hoisting Drawing.
7. Module Removal:
If possible, remove any obstructed module before lifting.
If it is not feasible to remove the module, ensure it is positioned on the edge of the hanging cable and provide additional protection.
8. Secure Transport:
The clamping unit and the injection unit must be secured against slippage using transport safety devices provided with protection.
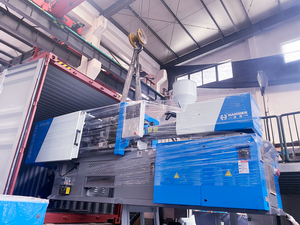
When transporting the injection molding machine with a forklift.
Place a non-slip gasket (8mm thickness) between the injection molding machine and the forklift.
Please note that some customers may have ordered non-standard optional items, which can affect the machine’s center of gravity.
For special models, please refer to the detailed transport diagram as these models will have different illustrations replacing the standard model’s icon.
Furthermore, it is essential to maintain a safety distance from surrounding fixtures.
Lifting and Installation of the plastic injection molding machine
Plastic injection molding machine is a kind of heavy machinery.
In order to ensure the safety and normal operation of the machine, the first step is to pay attention to the lifting and installation of the injection molding machine.
The following are the steps and some precautions for lifting and installing the injection molding machine.
Choose a suitable location
Determine a suitable location for the injection molding machine, taking into account the space requirements and the proximity of utilities (power, water, etc.).
Try to install the injection molding machine in a well-ventilated area that can support the weight and size of the machine.
Preparation of tools
-Lifting equipment (cranes, forklifts, hydraulic jacks, etc.): used to lift the injection molding machine;
-Rigging equipment (slings, chains, straps, etc.): used to lift and transport the injection molding machine;
-Protective materials (rubber mats or pads): to prevent damage to the machine and floor during lifting and installation.
Precautions before lifting
-Lift the machine according to the lifting diagram.
Ensure its balance when lifting and safety and stability when moving up and down.
-The lifting capacity of the crane should be greater than the weight of the machine.
And the lifting capacity of the lifting cable or wire rope should be greater than the weight of the machine.
-If the cable may touch any part of the machine, place a scrap of cloth or block of wood between the cable and the machine parts to avoid damage to the tie rods etc.
Injection molding machine lifting
-Lifting small injection molding machines: one-piece
-Lifting medium and large-sized machines: the body of medium and large-sized machines is assembled and cannot be lifted in one piece.
If the machine must be lifted, it is necessary to separate the mold clamping device from the injection device and then lift the two body parts separately.
The two body parts are connected together by locating pins and locating bolts.
Placement of the injection molding machine
If the injection molding machine sits on a reinforced concrete floor, the installation generally does not require a foundation.
If the machine sits on a common shop floor, the installation requires preparing a foundation accordingly.
You can calculate the maximum surface pressure of the injection molding machine on a concrete floor based on its weight and the number/area of adjustable spacers.
Which reduce the contact area of the floor and thus increase the pressure of the machine on the floor.
Medium and large machines should be secured to the foundation using floor bolts.
Inspection
-Precision level: Adjust the parallelism of the injection rails to ensure that the machine is correctly leveled both horizontally and vertically.
-Parallel Ruler: Check and adjust the parallelism of the tie rods of the movable moldboard to meet the requirements of its usage performance.
Uninstall, Rust inhibitor
Machine Uninstallation:
Remove all of the packaging after the injection molding machine arrived inspect the machine for any damaged parts and ensure it is in good condition.
The carrier must record all information about any damage that occurs during transport.
Use a crane with sufficient capacity for unloading, referring to the machine data sheetfor its weight.
When lifting, place waste cloth or woodblock at the contact point between the cableand the machine to prevent damage.
If the machine needs to be moved within the workshop without a crane make sure touse the appropriate logs correctly.
Please note that the manufacturer is not responsible for any damage that occurs duringtransit.
Mould Uninstall ation:
First confirm that the mould can be opened and closed normally without abnormality.
Then press the mould under pressure, fix the mould with the lifting ring, lift the mould by crane, loosen the pressure plate screws.
Slowly move the injection molding machine template, confirm that the mould will not fall.
Quickly open the injection molding machine template, use the injection molding machine nozzle to push the gate sleeve of the mould with a little afterburner,
So that it is separated from the injection molding machine.
Then move the crane to make the mould in the center of the template of the injection molding machine, slowly lift.
And place the mould in a safe zone at a height higher than the machine tool, and the mould removal is completed.
Rust inhibitor
Causes of rust
Gas produced by melt decomposition
Some raw materials will produce volatile gases after heating, and these gases are mostly corrosive, and they will corrode the mould.
Therefore, when the equipment stops working, the mould should be wiped clean with a soft cloth, and the mould should be closed.
If it is not used for a long time, the mould cavity should be sprayed with rust inhibitor.
And the mould should be coated with oil when closing the mould, and the gate should be blocked.
Cooling water in the mould
Cooling water is mostly used in the mould for cooling, so there is more water vapor around the molding equipment.
If the mould is cooled below the dew point, the moisture in the air will form water droplets on the surface of the mould, and if it is not wiped off in time, it is easy to rust.
Especially after the mould stops working, condensation can quickly occur.
Therefore, when you stop molding, you should also turn off the cooling water and wipe the mould dry.
Carbides produced during molding
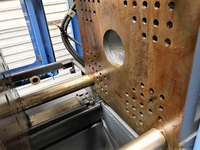
After the mould works for a long time, the molding material precipitates and decomposes to form carbides, which often makes the mould wear, corrode or rust.
In this regard, if carbide formation is found, it should be removed immediately.
So rust of injection molding machines and moulds is a normal phenomenon, caused by special reasons, not steel quality problems.
Avoid rust
Avoid putting the mould in the wet ring.
If the mould is left in a damp place for a long time, even if a rust inhibitor is used, it will eventually cause the mould to rust.
Therefore, it is important to pay attention to the environment in which the mould is stored.
It is best to choose a dry and ventilated mould rack, so that you don’t have to worry about the mould rusting when you store it for many years.
Anti-rust can only be used after cooling.
If the mould is sprayed with rust before it cools down, the mould will rust within a few days.
The reason is that before the mould is warmed up, it will absorb the moisture in the rust inhibitor, and it will produce signs of rust.
The best way is to wait for the mould to cool down naturally, and then use the mould rust inhibitor after cooling.
Long-term anti-rust use.
At present, there are many anti-rust agents, anti-rust oils, and anti-rust powders on the market.
However, the long-term rust inhibitor is a professional mould rust inhibitor, and the general rust prevention cycle is one to three years.
It can effectively ensure the safety of the mould in the factory and reduce unnecessary losses.
Before shipment, all exposed parts of the machine, such as guide rods, tie rods, andform work surfaces, are coated with an anti-rust agent.
This agent mixes with lubricating and hydraulic oils on the bearing surfaces to form a protective film.
Please keep the rust inhibitor on the machine where rust protection is required and it does not affect the operation.
This provides basic protection against the adverse effects of the outside environment.
It is advisable to wipe off the rust inhibitor with a cloth only if necessary.
Do not wipe off the rust inhibitor with solvent.
Please ensure that everyone involved in the lifting, installation, and maintenance processes is familiar with these instruction.
How to Adjust the injection molding machine level
Ensuring that your plastic injection molding machine is level and parallel is a key part of preventive maintenance.
Adjust the injection molding machine level is the important factor to use machine.
Horizontal and parallel means that your machine runs in a linear fashion (fixtures and injection units).
Overall, the injection molding machine itself should be level and parallel to the leveling pads underneath the machine.
Fixing and moving the platen also needs to be perpendicular to the base of the machine.
So how to judge if the machine is out of alignment and how to adjust the injection molding machine level?
The signs that my machine is out of alignment
The nut locking assembly on the dynamic plate/clamping cylinder begins to hang or stick.
When the nut lock hangs, you will receive an alert and the machine will not be operational.
This suggests that something may change with the level or parallel of the machine.
The clamping speed is slowed down.
This is usually caused by uneven flow of grease to the rods and slides.
You should be able to see that the grease is flowing unevenly and your bar and chute will start to get hot.
The mold flash and the mold guide pin are unevenly worn.
If the molds are not square and parallel, then you will start to see an increase in the mold flash.
Adjust the injection molding machine level
Method 1:
Tools used: precision strip level, aluminum-magnesium alloy leveling ruler.
Foundation requirements:
The total injection molding machine must be placed on an integral base platform.
The dimensions are needed in the foundation installation drawing.
And the height difference of the platform should not exceed the adjustment amount of the adjustment pad.
Preferably less than 10 mm.
Injection Molding Machine level adjustment steps
Loosen the connecting bolts between the mold clamping and the shooting table frame.(Models above HCK600)
Place a precise bar level in the longitudinal direction of the guide rail in the clamping area to detect the clamping unit, with a tolerance of 0.2 mm/m.
Vertically placed precision bar level on the guide rail in the clamping area to detect the clamping unit
Use the frame base to adjust the pad iron to adjust the vertical height to meet the leveling requirements.
For lateral measurement, an aluminum-magnesium alloy ruler should be placed on the tie rod near the fixed plate.
The allowable deviation is0.2 mm/m.
Use the frame base to adjust the shims to adjust the lateral height to meet the leveling requirements.
Adjust the frame of the launcher in the same way.
Tighten the nuts and screws of the machine base.
Special Note: The machine needs to be readjusted after 4 weeks of operation, and rechecked after 1 year.
Method 2:
Clean each leveling foot and oil each leveling screw.
Have a professional use a torque wrench to put each leveling foot at the same torque.
Place one layer across the tie bars (or rails, if they support the platen) against the fixed platen.
Place another level near the mold height adjustment platen and a third level parallel along one of the tie bars.
The person in the best position to see all three levels should now instruct the person making the initial adjustments.
Which feet to move slowly up or down until all three levels are level.
Regardless of age, your injection molding machine needs to be level to keep the platen parallel and the mold parting line in good shape.
In other words, to keep producing consistent, high-quality parts. If the injection molding machine is not level.
The two halves of the die will actually grind out a little bit when they fit together and reach tonnage when clamped.
Above is how to Adjust the injection molding machine level.
Plastic injection molding is all about a precise process. So in order to maintain a consistent, high-quality part output, your machine needs to be level.
Cooling water connection
Cooling water connection refers to the pipe or piping system used to supply and circulate cooling water within the injection molding machine during the cooling phase of the injection molding process.
It is an important part of the overall cooling system within the machine.
The system may include additional components such as cooling towers, chillers, pumps, and temperature control units.
Cooling water connections typically involve connecting hoses or pipes to designated inlets and outlets on the injection molding machine.
These connections allow cooling water to circulate through the mold’s cooling channels or passages.
The cooling water absorbs heat from the mold, carries it away and maintains the desired temperature within the mold cavity.
Proper maintenance and monitoring of cooling water connections is critical to ensuring consistent and effective cooling.
Check regularly for leaks, proper water flow, and adequate pressure
Notes on cooling water connection
If the pressure in the cooling water system is not relieved before starting work, explosive pressurization may result.
Creating a risk of damage and injury, so verify that the cooling water supply provides adequate flow and pressure.
Cooling water shall continue to circulate under low pressure during shutdown in winter especially northern region.
Water in cooler shall be drained if cooling water may freeze in the night.
Residual water shall be drained by compressed air to avoid damage to cooler and other devices.
Also check the cooling water flow control unit daily for flow and leaks.
Check the cooling water connections and hoses for flow and leaks.
If the coolant is dirty, the sight glass may need cleaning. Flush with descaling solution every 20,000 hours of operation.
Cooling water system – schematic
The cooling water system has three circuits, namely 1) hydraulic cooling circuit, 2) screw barrel cooling circuit and 3) mold cooling circuit.
A pipe from the water source supplies water to the oil cooler.
Another pipe of the water source supplies water to the cooling segments.
And then supplies water to the mold and screw barrel cooler after shunting to effectively control the temperature.
The cooling water system in the injection molding machine consists of a cooling source.
Water inlet and outlet, pump, cooling channel in the mold, and temperature control unit.
Cooling water is supplied to the machine, circulates through the cooling channels of the mold through a pump,
And absorbs heat from the mold to promote the solidification of the plastic.
The heated water is then returned to the cooling source for dissipation or further cooling.
The temperature control unit ensures optimal cooling conditions by monitoring and regulating the water temperature.
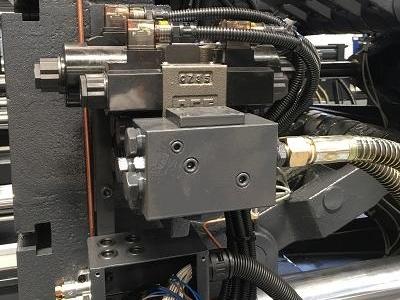
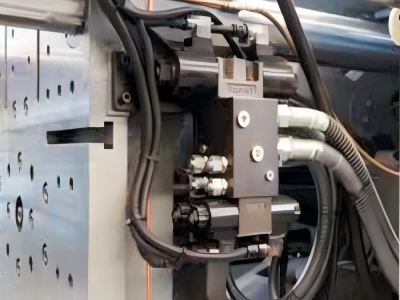
Inject hydraulic oil
Important components of efficient hydraulic system operation are proper oil selection, cleanliness, and monitoring the value retention of the system and components.
The machine should inject hydraulic oil through the air filter until the oil level indicated by the oil level gauge is above the middle mark.
Important safety instructions:
Before starting to inject hydraulic oil, wear personal protective equipment such as gloves and goggles.
Assume all hydraulic hoses and components are pressurized.
Before disconnecting any hydraulic lines, relieve all hydraulic pressure.
Never try to stop or check for hydraulic leaks with any part of your body; use a piece of cardboard to check for hydraulic leaks.
Small leaks in hydraulic hoses are extremely dangerous and may inject hydraulic oil under the skin even when wearing gloves.
When hydraulic oil penetrates the skin, it may cause infection and gangrene.
Get medical attention immediately to prevent loss of limb or death.
Required tools and equipment
Hydraulic oil suitable for the system
It is recommended to use 46# wear-resistant hydraulic oil.
Hydraulic 46 is part of Crown Oil’s range of premium mineral-based hydraulic fluids that offer excellent anti-wear properties to protect the most demanding systems, while still meeting ISO standards for hydraulic fluids.
This hydraulic oil is anti-rust, anti-corrosion and anti-oxidation.
Funnel or suitable container with pour spout.
A clean, lint-free rag is used to wipe up any spills or drips.
Steps to inject hydraulic oil
Find the hydraulic oil tank. This is usually a large tank or container installed on or near the equipment.
Determine the type and quantity of hydraulic oil required.
Place a funnel or a suitable container with a nozzle on top of the opening of the reservoir, and slowly pour the hydraulic oil into the funnel or container.
So that it flows into the tank. Monitor the oil level in the tank when pouring to avoid spills.
Once the correct oil level is reached, remove the funnel or container and use a clean lint-free rag to wipe away any spills or dripping oil from the reservoir and surrounding area.
Close the reservoir cap or lid securely to prevent contamination.
If one of the following conditions occurs, the hydraulic oil should be drained and replaced.
Component failure.
There is water or foam in the hydraulic oil.
The hydraulic oil has a rancid smell (sign of high heat).
When maintenance schedule requires.
When changing hydraulic oil, be sure to replace the hydraulic filter.
As technology advances, the requirements for cleanliness and proper quality of hydraulic fluids continue to increase.
Most hydraulic system failures are caused by hydraulic oil contamination, such as fouling caused by contamination.
These can cause hydraulic equipment to get stuck in place or behave erratically, leading to production issues and potentially serious injury.
Therefore, hydraulic system manufacturers and machinery users must emphasize the importance of hydraulic oil cleanliness during the injection hydraulic oil.
How to Reduce power of electricity consumption of injection molding machine
Injection molding is a versatile manufacturing method that can help save costs and provide customers with higher product value, and it is used to produce a wide variety of products and parts.
One fact that most people don’t know about injection molding is that power of electricity accounts for 90% of the operating costs of injection molding equipment.
With this in mind, the overarching question is how to reduce power of electricity consumption of injection molding machine thus significantly reduce overall production costs.
The introduction of power of electricity of injection molding machine
The electricity power is AC400, 50Hz, 3 Phases.
The machine shall be connected to the external protective earthing system, prevent happening leakage of sensitivity electricity or influence and make power control digital signals mass.
The difference for the voltage of ±5% is acceptable; treatment of holding voltage
while is out of the scope, in order to make sure the normal and steady production.
Connect the supply conductors to the terminals of the electrical main switch as above diagram.
Rotate the handle from the outside to the On position, the machine will be powered on.
Turn the handle to the Off position, the electrical power supply will be cut off, the machine stops running.
Parts that affect the power consumption of injection molding machines
Hydraulic system oil pump electrical energy consumption.
heater power consumption.
circulating cooling water pump power consumption.
Methods for reduce power of electricity consumption of machine
Nano energy-saving heating ring for injection molding machine
For the heating and energy saving of the barrel of the injection molding machine.
The infrared radiation conduction method is adopted, and the nano infrared energy-saving electric heating ring is installed on the outside of the heating object.
So that the heat is conducted in one direction, and the heat is effectively conducted to the heating body.
And the volume is small, the thermal inertia is large, and the temperature control accuracy is high.
The thermal efficiency is more than 99.8%, and the power saving can reach more than 30%.
Energy-saving insulation sleeve for injection molding machine
It is used for injection molding machine barrel insulation and energy saving, reducing heat loss and energy saving.
Covering plastic extrusion, injection molding and surface temperature, reducing heat loss.
And achieving the purpose of energy saving, thereby saving production electricity and air conditioning electricity.
Maintain good lubrication of equipment transmission components to reduce increased energy consumption due to increased friction or unstable operation of the equipment.
Above is how to reduce power of electricity consumption of injection molding machine.
Reducing power of electricity consumption can also help extend the life of your machine by reducing wear and tear on components.
This can save on maintenance and repair costs over time.
Panel shows
Control Panel
At present, there are three commonly used injection molding machine control systems, namely traditional relay type, programmable controller type and microcomputer control type.
Therefore, there will be a computer control panel on the injection molding machine to facilitate the user’s operation.
In recent years, programmable controllers (PLCs) have been widely used in injection molding machine control systems due to their high reliability and performance.
In order to improve the level and quality of the control system of the injection molding machine.
A programmable computer controller (PCC) designed for small and medium-sized control systems at a higher level than PLC came into being.
PCC integrates the characteristics of standard PLC and industrial control computer.
Has a multi-task time-sharing operating system, and has more powerful data calculation and processing capabilities than PLC.
The control system of the injection molding machine is composed of PCC, which realizes a variety of controls of the entire injection molding process.
Including position control, speed control, temperature control, fault control and real-time display.
This computer control panel can greatly improve the quality of plastic products and improve economic benefits.

Panel Description:
Data lock: Setting parameters requires opening.
Recycle button: After each opening and closing of the safety door, the recycle
button must be pressed once before the machine can operate.
Emergency stop button: In case of emergency, press the button to cut off the power
supply for motor and heating; reset by rotating button in the direction of the arrow.
Operating key: For detailed descriptions of each function button on the panel, see
section 1.1 of the Controller User Manual in Appendix 13.
Viewing screen.
Precautions for using panels
In order to protect your interests, please read this operation manual carefully before using the machine and pay special attention to the following precautions.
Since the computer panel is a high-precision product, a good power supply system plays a vital role in the normal use and life of the computer panel.
The machine must be well grounded, otherwise in some special cases may produce unpredictable situations, and may even seriously damage the computer panel.
The computer panel will be damaged when it is hit badly.
Please be sure to check the anti-collision parts of the safety door regularly, and replace them in time to avoid unnecessary safety problems when damaged.
Haichen has rich experience in plastic injection molding production.
We are committed to providing fully automatic, excellent and precise plastic injection molding.
Which can provide you with efficient and large-volume product output needs.
we are able to provide a one-stop solution for the specific design of plastic injection molding machine.